I’ve struggled with digestive issues my whole life. It was only recently that I went through some intense DNA-level tests (which, by the way, not cheap) that my food sensitivity fears were confirmed.
So why did I decide to spend thousands of dollars on these tests? Well, when I sat down with a nutritionist and said “I’m having a hard time digesting wheat, and oh I think I might be lactose intolerant too, and when I eat eggs and toast, I was always assumed the bread was the issue but now I’m thinking it might be eggs that I’m sensitive to…” the nutritionist looked at me like I was crazy and said I should a) quit play guessing games and b) I still had another 30-40 years (hopefully) ahead of me and therefore wouldn’t I want to just know definitively which foods my body can tolerate and which it cannot?
The ImuPro test results took weeks to arrive (“samples” were sent to the U.S.) and were crushing. It turns out I have 40 food sensitivities out of 270 that were tested! Eggs, gluten and dairy were at the top of the list. I am a home chef and cookbook author and therefore these test results were extremely hard to digest. Literally. My new cooking journey now places a strong emphasis on food allergies and this not only impacts me, but my family as well.

I want to stress here that there is a significant difference between food intolerances/sensitivities (also known as delayed or chronic food allergies) and traditional food allergies. Read up here for more details. There are 8 foods that make up 90% of food allergies: peanuts, tree nuts, milk, egg, wheat, soy, shellfish, and fish (source).
If you have food allergies or delayed food allergies/food intolerances, as per my nutritionist, your child is more prone to having many of the same food issues, as we mamas pass the antibodies to our children through breastfeeding and the placenta. My son does not have any food allergies (these are usually detected very early on in children when you introduce solids gradually and/or via allergy tests like blood or skin prick tests). I haven’t done the ImuPro test for him yet as he’s only two, but I have started being more conscious and thoughtful of what I’m feeding him knowing that he is pre-disposed to issues with food and digestion.

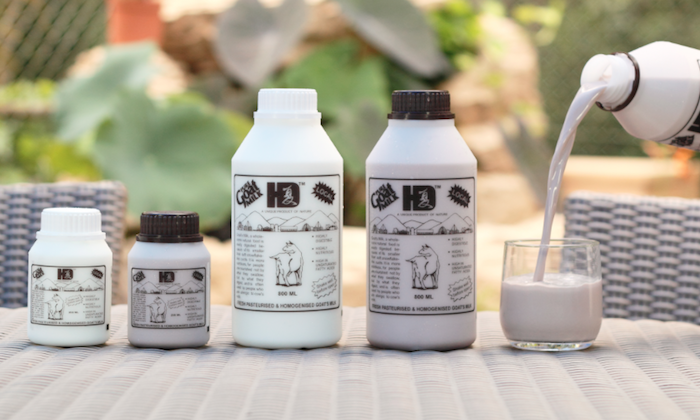
We’ve already switched him to goat’s milk (fresh from Singapore’s own Hay Dairies!), which is much easier to digest than cow’s milk, have cut back on gluten where and when we can, opted for gluten-free grains as much as possible, and eggs are limited to once or twice a week.
Fortunately there is now a lot more awareness around food intolerances and many more options available. Let’s look at gluten-free for example.
Gluten is essentially the protein present in grains (primarily wheat including spelt, semolina, rye and barley) which many tummies find hard to digest. Gluten-free grains include corn, buckwheat, amaranth, millet, quinoa, tapioca, rice and sorghum. Oats are controversial because they are actually gluten-free, but most commercially available oats are processed or packaged with wheat so you have to look for brands that specify gluten-free oats.
One thing to keep in mind with gluten-free foods is that you still need to read the nutrition label carefully. For example, you might be buying kid-friendly quinoa pasta thinking it’s made with healthy quinoa, but in fact it’s only 20% quinoa and the rest is all rice flour or corn flour — still gluten free, but not necessarily as nutritious for your child as you might have assumed. You would be better off just serving your little one some quinoa.

Also avoid the temptation to load up on gluten-free snacks! These are fine once in a while and great for kids on the go, but there are plenty of other snack options that are naturally gluten-free/grain-free such as raisins, cheese sticks, fruit, and veggie sticks with hummus.
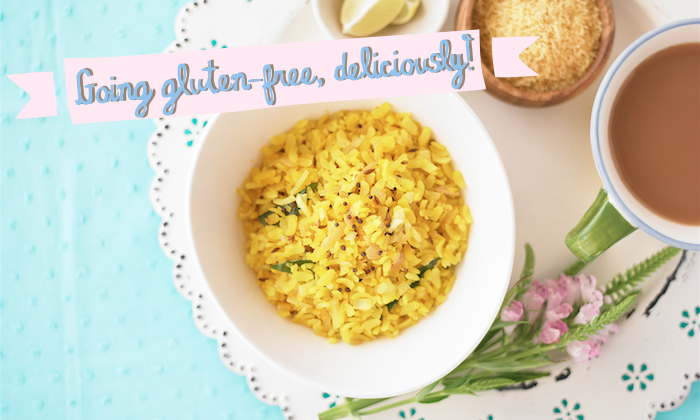
For gluten-free adults and children, breakfast is often the most challenging meal, as it’s ridden with baked and bready temptations. I wanted to share with you one of my favorite gluten-free breakfast recipes from Cooking with Indian Spicebox.
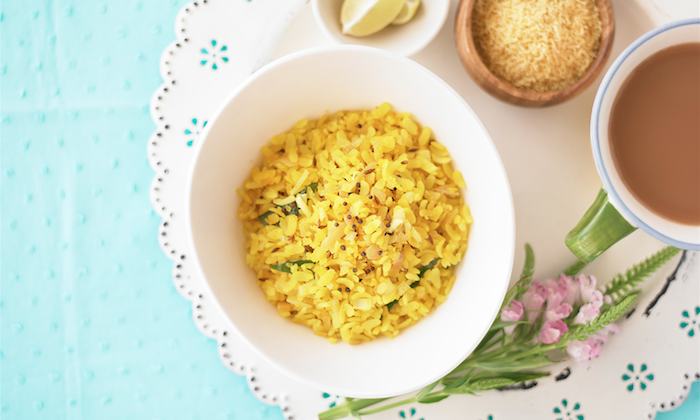
This dish, ‘Poha’ made with flattened rice flakes (you could opt for healthier brown rice flakes) is a regional Indian favourite enjoyed by adults and children alike. Leave out the green chili if you’re making it for little ones. This is probably not what you (or the kids) think breakfast looks like, but I assure you, Poha is delicious …so stay open-minded!
Poha also happens to be dairy-free, egg-free and vegetarian (vegan, in fact), and you can easily add in some veggies (peas, chopped carrots or beans) to this recipe. The starch in this dish is energy boosting, while mustard seeds have mood-lifting properties…perfect for breakfast or a snack before soccer practice!
Don’t let gluten-free scare you, mama. Ultimately gluten-free grains are easier to digest and better for you and your kids in the long run, so get to know them and give them a try! Check out this handy chart that explains how to cook most gluten-free grains. The easiest way to introduce and incorporate them is to add them to a salad or soup. Cooking the grains in broth bumps up the flavour, and adding in your child’s favorite veggies and protein is a great way to warm them up to these new foods.
Namita is starting cooking classes this month! Click the link for more info, mamas!

Poha (Flattened Rice)
1 cup (100 g) thick poha (flattened rice)
1 tablespoon (15 ml) oil
1⁄4 teaspoon mustard seeds
1⁄4 teaspoon cumin seeds
1 green chili, finely chopped (leave it whole if you don’t want too much heat)
8 curry leaves
1⁄2 medium onion, finely chopped 1⁄2 teaspoon turmeric powder
1⁄2 teaspoon salt
1⁄2 lemon or lime
Fresh coriander, finely chopped, for garnish
1. Put the poha in a large bowl, wash well, and drain the water. Set the flakes aside for 5 minutes.
2. Heat the oil in a wok or kadhai on medium heat, and add the mustard seeds, cumin seeds, green chili, and curry leaves. Stir until the seeds crackle, and then add the chopped onion. Sauté the onion until translucent.
3. Add the turmeric and salt; stir well and sauté for a few minutes.
4. Add the poha flakes, one heaped tablespoon at a time, mixing in well so that the flakes evenly absorb all the spices and yellow turmeric coloring.
5. Turn the heat down to a simmer, sprinkle a handful of water over the top, cover the pot, and let the poha steam through for a minute or two.
6. Turn off the heat; remove the cover, and squeeze some lemon or lime juice over the top. Sprinkle with fresh coriander and serve hot.


 View All


 View All


 View All


![[𝗙𝗥𝗘𝗘 𝗔𝗡𝗗 𝗙𝗨𝗡] 𝗞𝗶𝗱-𝗳𝗿𝗶𝗲𝗻𝗱𝗹𝘆 𝗘𝘃𝗲𝗻𝘁𝘀 𝗛𝗮𝗽𝗽𝗲𝗻𝗶𝗻𝗴 𝗧𝗵𝗶𝘀 𝗟𝗼𝗻𝗴 𝘄𝗲𝗲𝗸𝗲𝗻𝗱! 🐣
“Mum, what are we doing today?” 🫠 If you’ve heard this one too many times already, we’ve got your Easter weekend sorted!
There’s a treat for football fans at Our Tampines Hub, a massive Mummys Market to check out, a pet-friendly pop-up at East Coast Commune (yes, dogs and kids welcome), plus tons of Easter fun happening across the island. And the best part? So many of these events are free. Zero guilt, just good vibes.
Comment “Weekend” or hit the link in bio for the full list of events happening this weekend!
Follow us on Telegram @sassymamasg for weekly family-friendly updates
.
.
.
.
.
.
#easterweekend #weekendthingstodo #whattodowithkidsduringweekends #KidsEventsSG #WeekendWithKids #ParentingSG #ThingsToDoInSG #SGMoms #SgKids #WeekendPlanner #FamilyActivities #FunForKids #SGfamilyfun #SGkidsactivities #SGparents #FamilyOuting #sgmummy #sgparents #sgmummies #sgbabies #sgtoddlers #sgchildren #sgfamily #sgbaby #sgparenthood #sgkid #mumsg #sgkidsactivities](https://www.sassymamasg.com/wp-content/plugins/instagram-feed/img/placeholder.png)
